


Enable Two-Factor Authentication
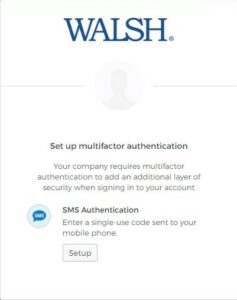
Multifactor Authentication (MFA) is now a required added layer of security used to verify Walsh staff, faculty, and students’ identity when signing in to an application.
There are three options available to complete the MFA requirement: Okta Verify, Google Authenticator, or SMS Authentication. Each Walsh member must choose at least one method to activate MFA.
It is strongly recommended to configure more than one MFA method in the event SMS or wireless services are limited.
OKTA VERIFY
Device Enrollment
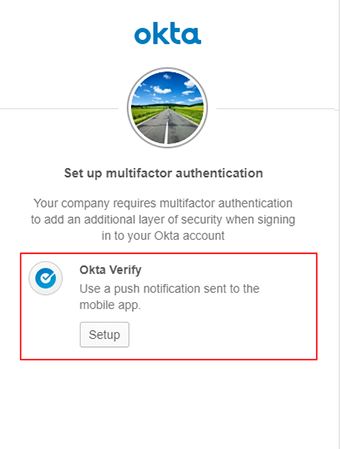
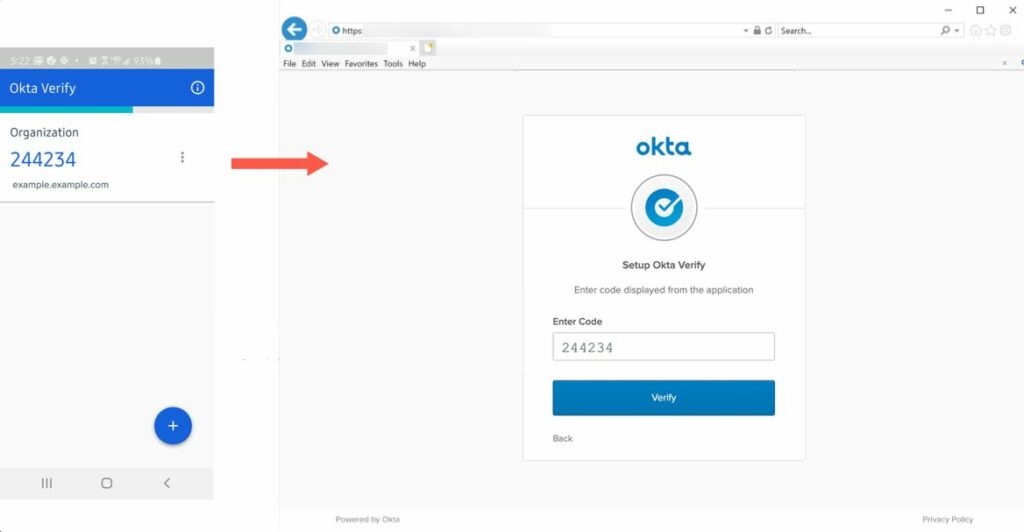
When you attempt to log into your Walsh College account, you must enroll your device with Okta Verify. Once enrolled, you will use Okta Verify to verify your identity each time you sign in.
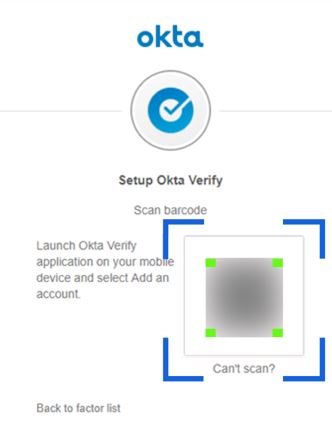
During enrollment, the app uses your device camera to scan a QR code displayed in your browser. If you cannot scan the QR code, follow the manual setup instructions below.
Initial Setup Process
- Click “Setup” when prompted on the “Set up multi-factor authentication” screen.
- Select your device type and click Next.
- Open the Okta Verify app.
- iOS:
- Tap Add Account.
- When prompted, allot “notifications” and “access to your camera”.
- Point your camera at the QR code displayed in your browser. - Android:
- Tap the “+” icon.
- Point your camera at the QR code displayed in your browser. - Allow camera access and scan the QR code.
- Click Finish in your browser to complete enrollment.
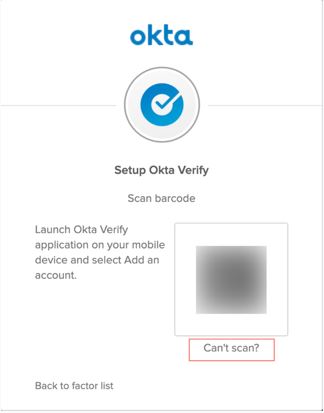
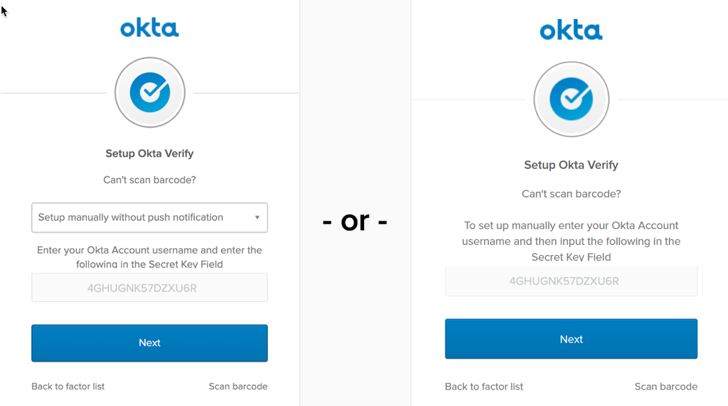
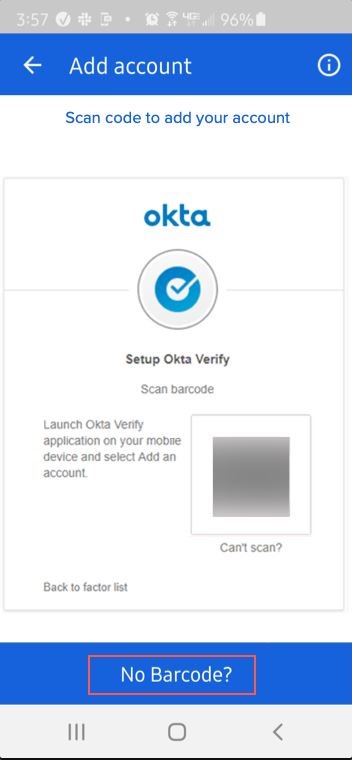
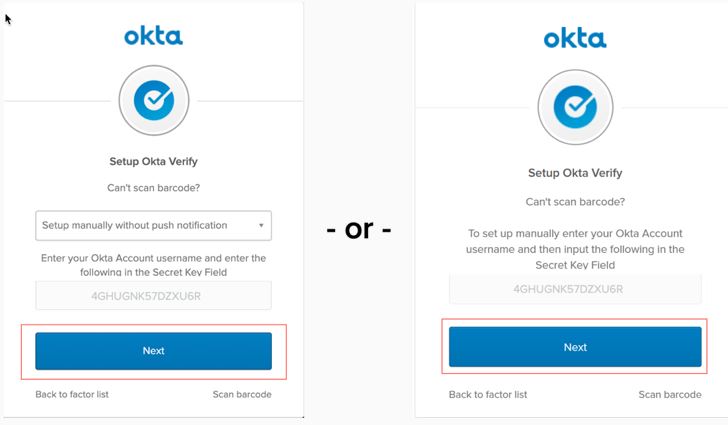
Enroll Without Scanning QR Code
Follow these steps if you are trying to enroll a device but can’t scan the QR code. Start with the instructions above up to the QR code displayed in your browser.
- Click “Can’t scan?” in your browser.
- The setup Okta Verify screen appears. There are two versions of this screen.
- Choose one of the following options (if available):
- Send activation link via SMS
- Send activation link via Email
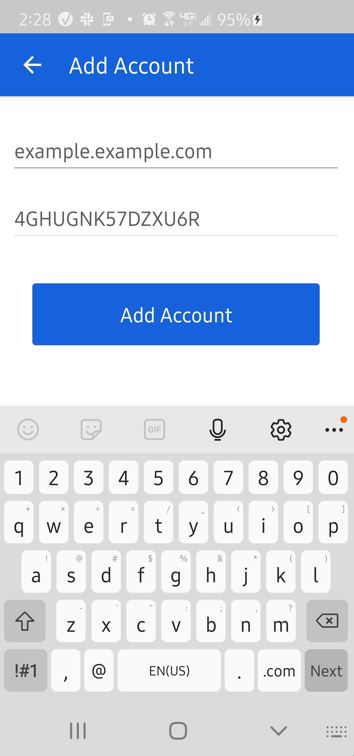
- Set up manually (make note of the Secret Key) - Open Okta Verify and select No barcode?
- Enter your Walsh email address and the Secret Key, then tap "Add Account".
- Enter the verification code displayed in the app.
- Click Verify.
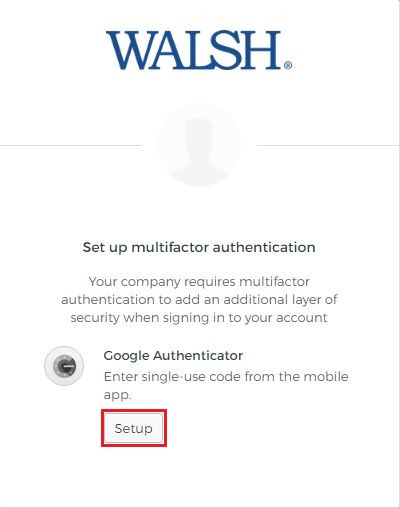
GOOGLE AUTHENTICATOR
About Google Authenticator
Users must use the Google Authenticator app to generate a six-digit verification code when signing in. After five unsuccessful attempts, the account is locked and must be reset by an administrator.
Initial Configuration
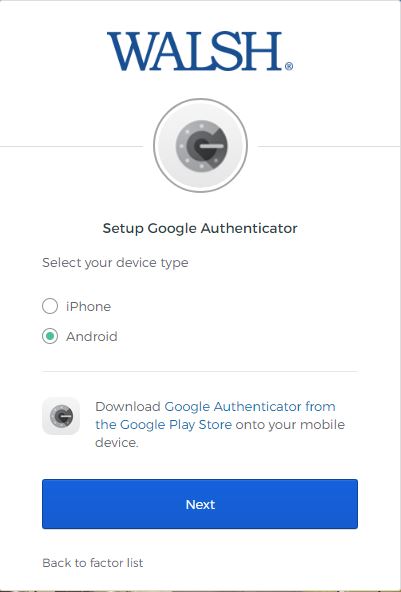
- Click Set up when prompted.
- Select your mobile device.
- Download and install Google Authenticator.
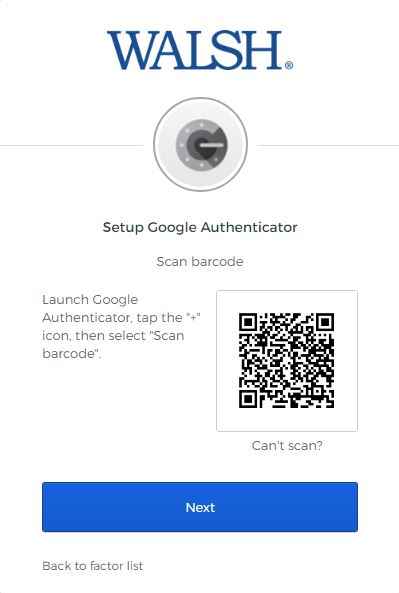
- Scan the QR code displayed on your screen.
Manual Setup Option
- Open Google Authenticator and click Get Started. You will then have the option to either scan the QR code or manually enter the code.
- If you select “scan a QR code”, you will then be prompted to “Allow Authenticator to take pictures and record video”. This is so the app can use your camera to scan the QR code shown above on the Walsh College page.
- If you select Enter a setup keyto configure an account manually, perform the following steps:
-
- Click the “Enter a setup key”.
- In the username field, enter your Okta/Walsh College username (for example, username@walshcollege.edu). - Click “Can’t scan” on your computer to retrieve the secret key.
- Enter the secret key into the app and click Done.
Using the App
After setup, open the app and use the six-digit passcode when prompted.
Note: The pass code generator screen appears and generates pass codes to use when prompted for extra verification. You have 30 seconds to enter the pass code before it generates a new one.
Reconfiguring Google Authenticator
You may remove Google Authenticator from the factors list and re-add it to reconfigure the app.
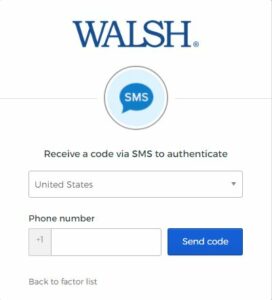
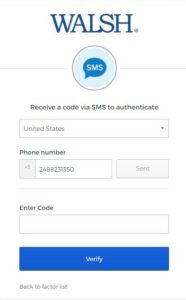
SMS AUTHENTICATION
Setup SMS Authentication
- Click Setup next to Text Message Code.
- Enter your mobile phone number.
- Click Send Code.
- Enter the security token sent to your phone.
Reset or Update Phone Number
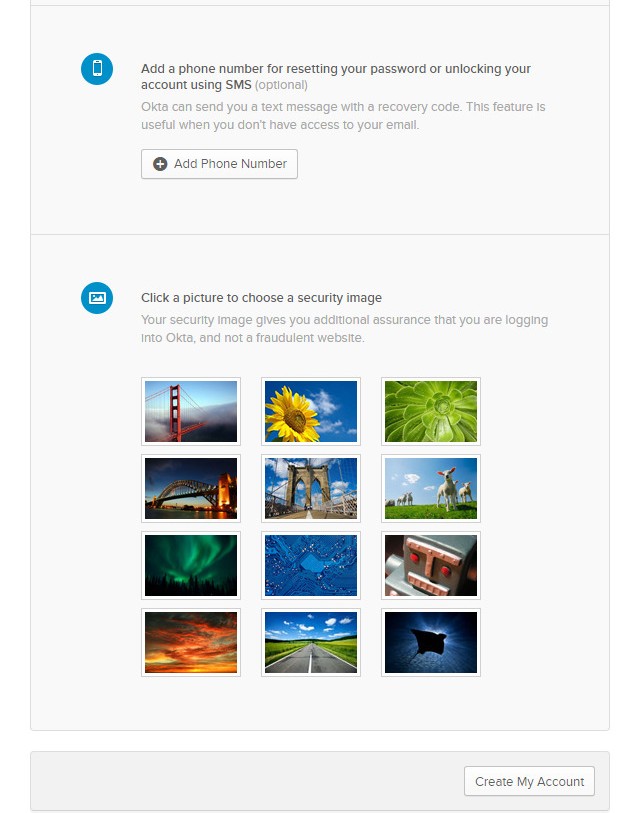
To reset or update your number, go to the Account tab on your homepage and click Setup in the Extra Verification section.
Important Note About SMS Messaging
When SMS factor authentication is enabled, users will receive authentication text messages when signing in — even if SMS opt-out was previously requested on the device. If SMS messaging is a concern, configure another MFA factor instead.